- Please access the Portal by using your Manager Access Account.
- After logging in, click on the Scantek Logo in the top right corner of the screen.
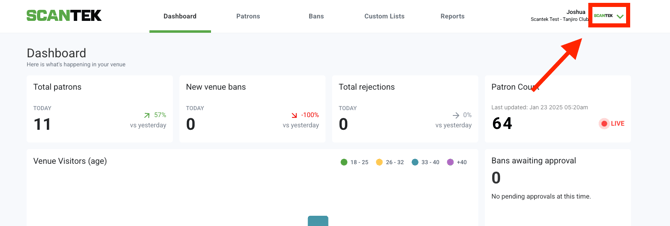
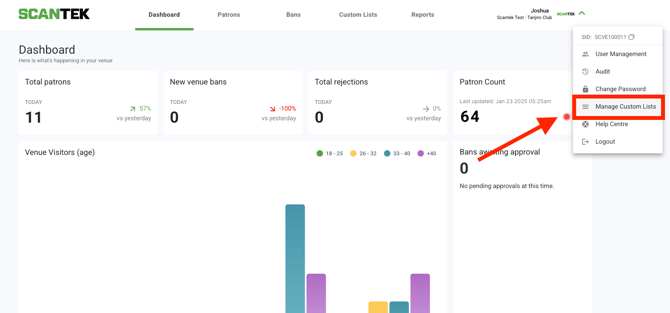
- A drop down menu will show once you click on the Logo.
- Select 'Manage Custom Lists'.
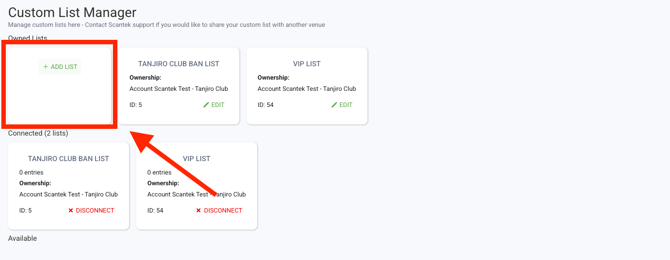
- This will open a new page with the lists that you have created.
- Click on '+ ADD LIST'.
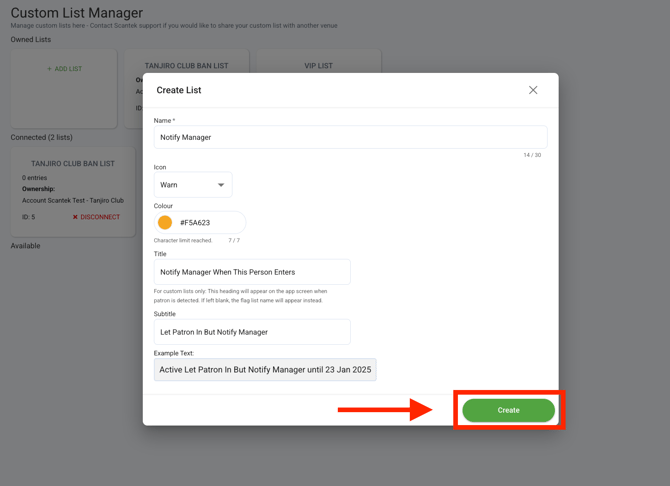
- A dialog box will appear, titled "Create List".
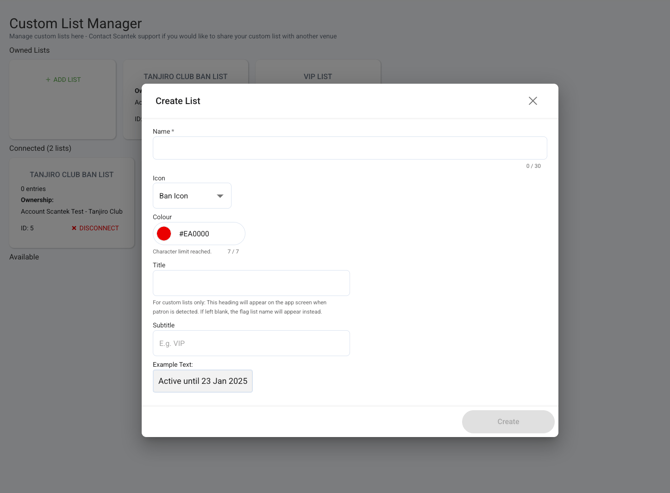
- Here you are able to create multiple lists for your entry management.
What do these mean?
- Name; This means the name of the list that appears e.g 'Scantek Employee List'.
- Icon; You are able to decide what Icon should appear on the app when you scan a patron and they are in your custom list. (Ban Icon, Flag, Warn, Tick & Plus).
- Colour; You can decide what color should appear on the app if a person on the list is scanned.
- Title; The title appears on the app screen when a patron on the list is scanned into the venue.
- Subtitle; This will allow you to customise the text in the box when a patron is scanned in e.g "This person knows the Owner"
- Once the required fields are created you can click on 'Create'.
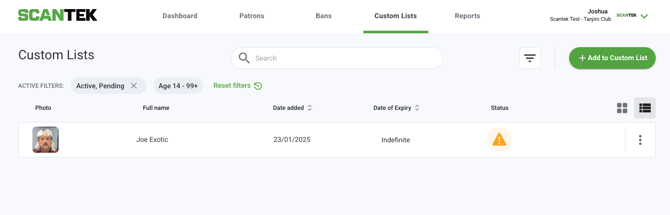
- Upon successfully creating a custom list, you will notice a new label titled 'Custom Lists' appearing in the top navigation bar.

- Upon selecting the Custom Lists Tab, you will be directed to your Custom List Patron Page.
- This page allows you to efficiently manage your Custom List Patrons allowing you to edit, cancel and delete.
Congratulations! You have now Successfully created your own Custom List.