
Content
3 - Create an BDR Login Account (New Venues Only)
IMPORTANT
BDR Fleet must be kept separate from all other inventory.
IMPORTANT
The Licensee must contact the Client (LGIRS) to join the BDR program.
Upon confirmation and request from the Client, complete the following steps to add the new venue to the system.
1 - Create a HubSpot Company
The Client will provide the venue and login information.
-
- Go to HubSpot > Companies
- Click Create Company
- Company Domain: E.g., scantek.com.au OR nowebsite.com.au
- Company Name: As provided by the Client.
- Company Owner: yourself / sara/ches
- Industry: BDR/TAMS
- BDR WA Region: Select from dropdown ‼️REQUIRED‼️
- Street Address | City | State | Post Code: As provided.
- Authorised Representative:
- Brand: Scantek
-
- Click Create
- Go to the Company page and update the following:
- Email: as provided by the Client
- Lifecycle Stage: Customer - End User
- Number of iPads: As requested by the Client
- SID: As found in the Admin (dev) Portal ‼️REQUIRED‼️
- Add Contacts (as provided by the Client)
- Add Assets (once allocated)
- Attachments: attach the form provided by the Client.
- Associate to parent Company (Department of Local Government, Industry Regulation and Safety (LGIRS))
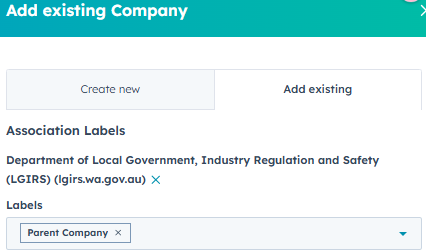
If you don't see these properties, customise your view to add them.
2 - Create a Ticket
If a ticket isn't automatically created when the Client sends the email request, create a ticket for the new install.
Follow the general Ticket Maintenance instructions.
3 - Create an BDR Login Account (New Venues Only)
- Go to the BDR Admin Portal (PROD)
- Login with your Scantek account as a Tenancy Admin
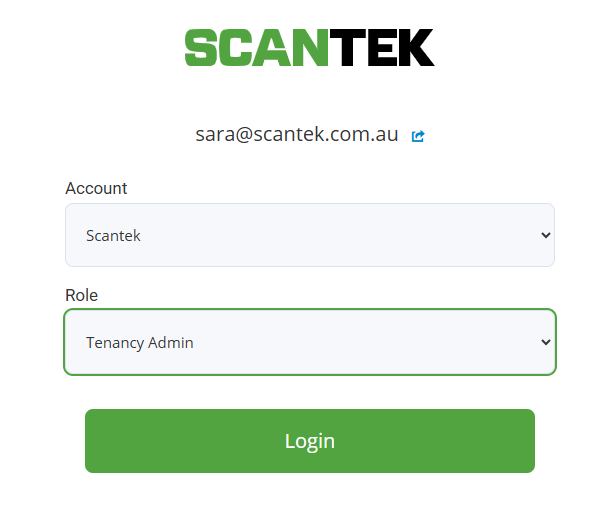
- Enter the MFA code from your authentication app
- Login with your Scantek account as a Tenancy Admin
If you can't login, contact your team lead or a Platform dev.
-
Click Settings > Add account > Enter the venue name
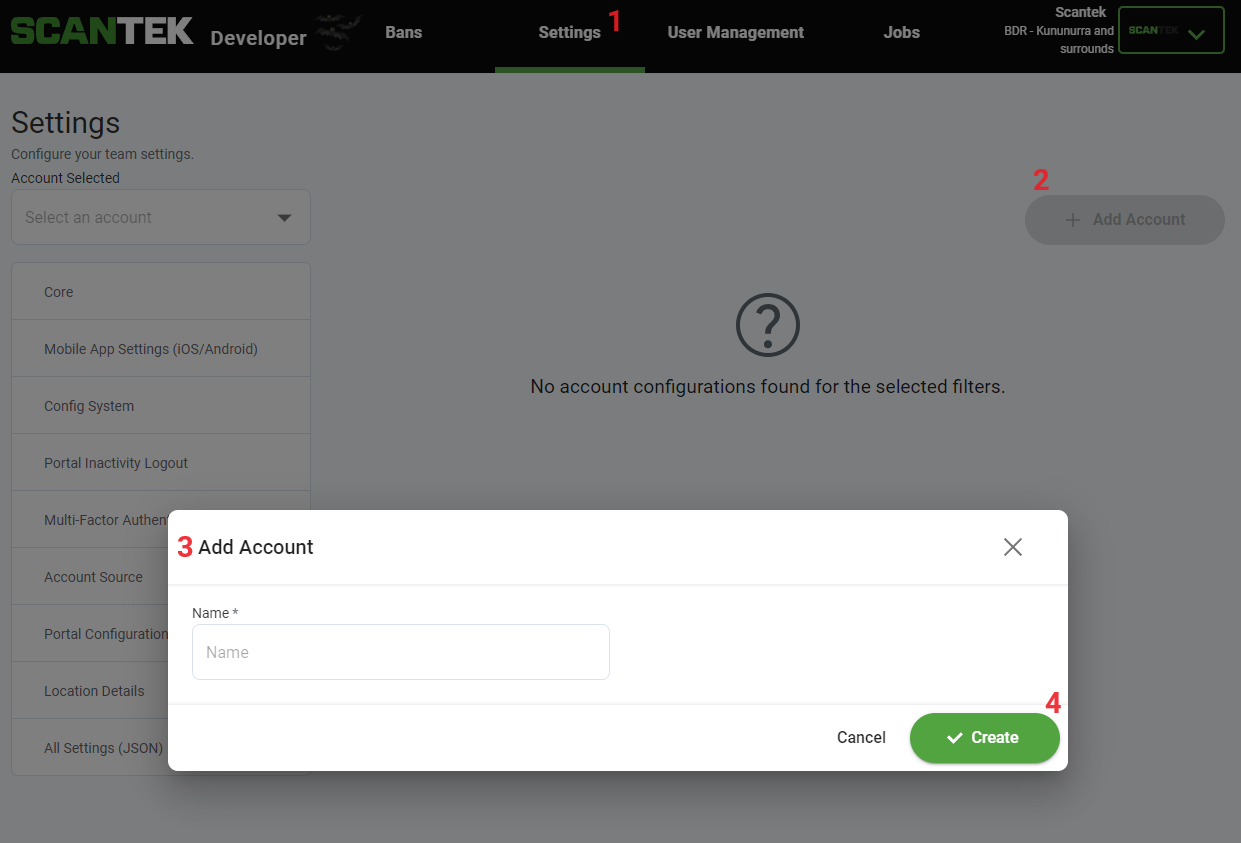
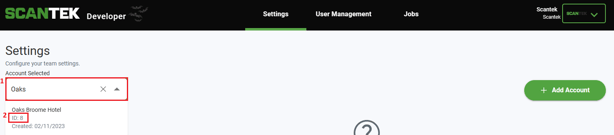
- On the Settings page, from the Accounts Selected drop-down, locate the account your just created.
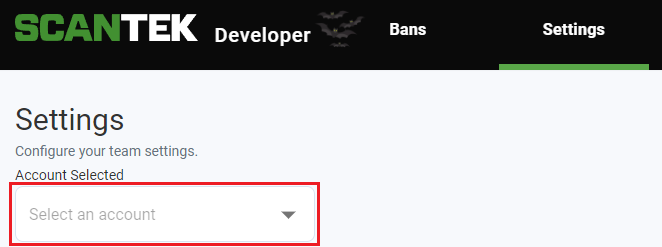
- Note the Account ID - you will need this for JAMF.
- Account tags: Note BDR venue ID is no longer required, its a legacy item from crm.
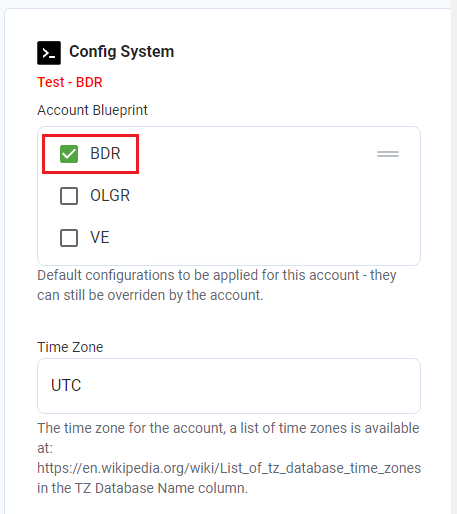
- Confirm that under the Config System the account blueprint is "BDR".
- Location: Suburb where the venue is located
- Enabled: Allow use of On Device Scanning (IDMS)
- Mobile App Settings:
Inactivity Notice Length - 30;
Inactivity Length (to trigger Auto Logout Notice - 600;
Personal Information Clear Length (to trigger Personal Information Clear Notice) - 600;
Personal Information Clear Notice Length - 10;
Patron Capture - Disabled;
Live Patron Conut - Disabled;
NSW DDL - Disabled;
Enable DDLs - Enabled;
Enable Screen Scraping DDLs - Enabled;
Minimum NSW DDL Workflowrun result polling (ms) - 5000;
Maximum NSW DDL Workflowrun result polling (ms) - 30000;
NSW DDL QR Code Timeout (Seconds) - 100;
Start of Day (Hour) - 22;
Start of Day (Minute) - 0;
End of Day (Hour) - 21;
End of Day (Minute) - 59;
Location Radius - 50;
Api Call timeout time (ms) - 30000; -
Multi-Factor Authentication - set to OTP.
- Section Check Configuration
- IDWS Host - Canary;
- Purchase Manage Enable - for TAMS venues only. To be configured by a developer.
IMPORTANT: (Please post in the BDR channel, requesting this be turned on) - Section Account Status: Operation Status - Open.
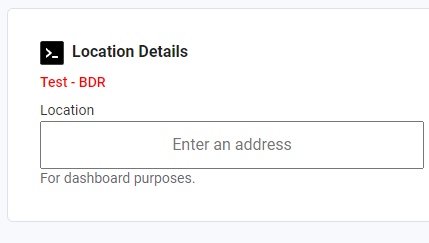
- Section Location Details and enter the venue's coordinates (use whatever Google spits out)
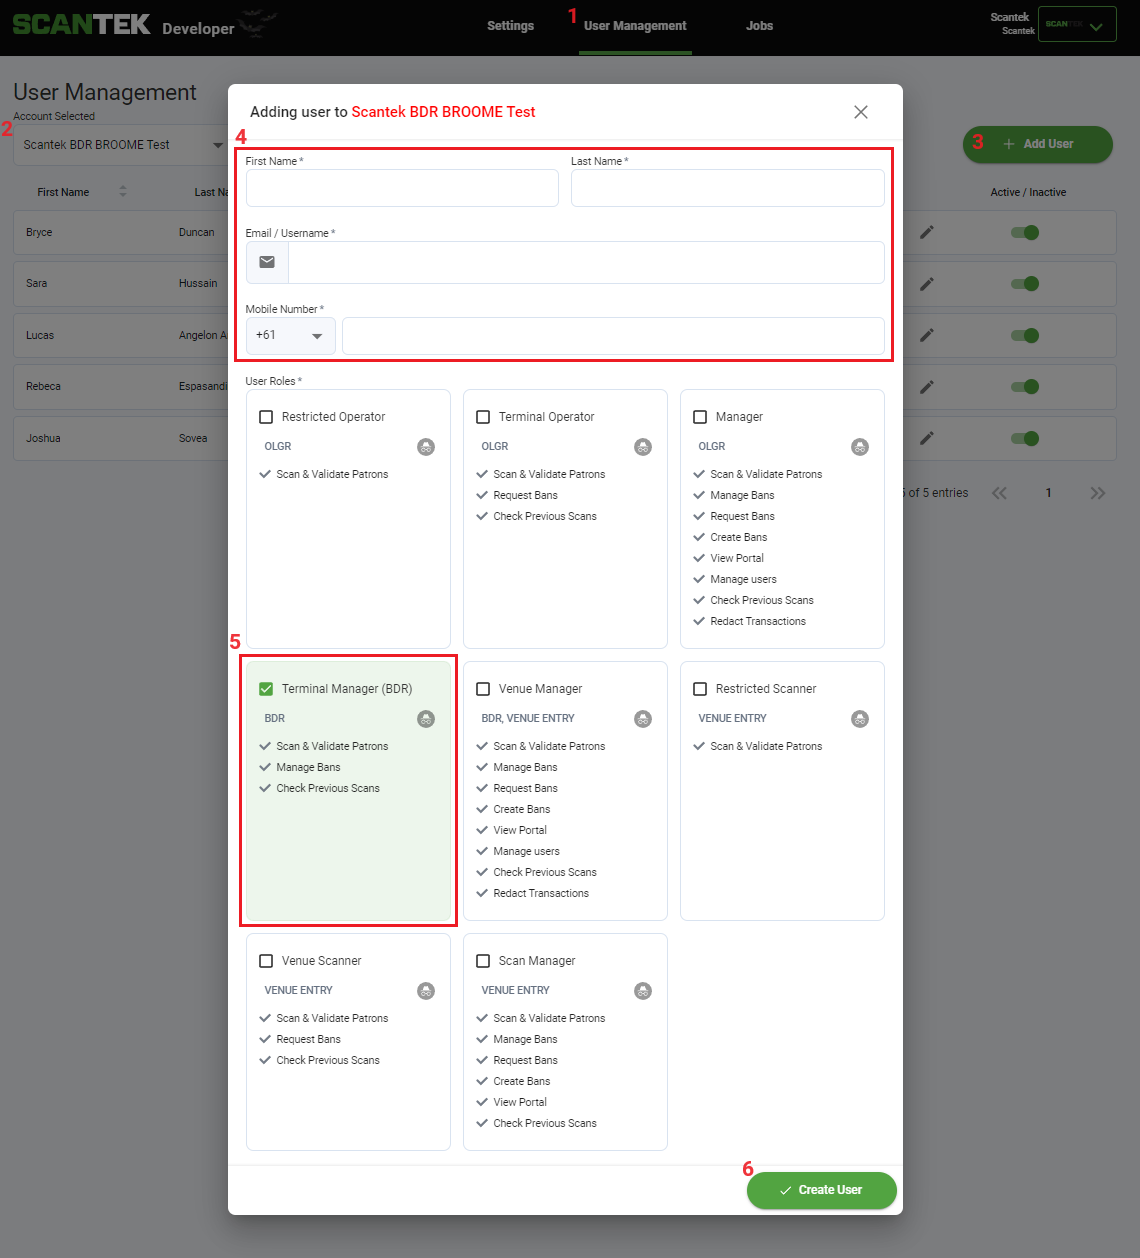
- From the User Management (1) tab, select the new venue (2) from the drop-down.
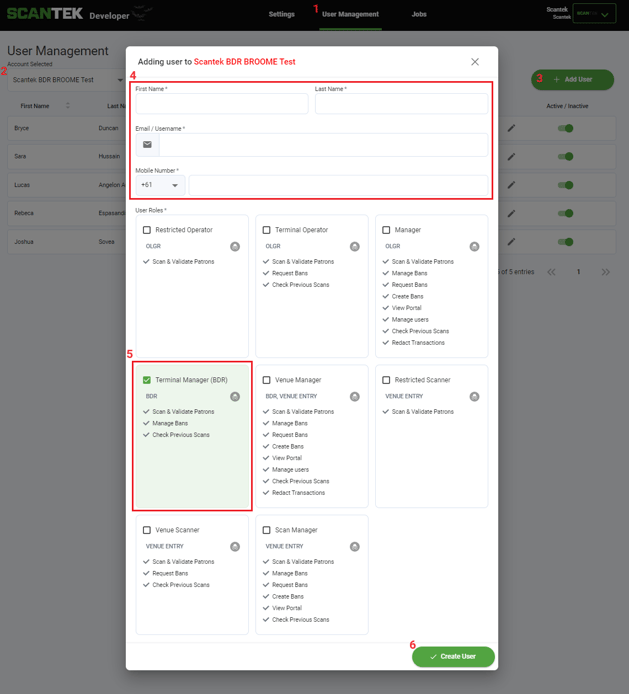
- Click + Add User (3)
- Enter the details (4)
- select Terminal Manager (BDR) (5), and
- Click Create User (6)
An email will be sent to the listed address with a temporary password. The user will be prompted to reset their password after logging in.
4 - Assign an iPad(s)
The spare BDR iPads and eSIMS are located in the BDR cupboard. Refer to the BDR Dashboard for the asset report.
- Grab an iPad and eSIM.
- Power on the iPad and note the SN
- Scan the eSIM and confirm it's working by disabling the Wi-Fi and googling something.
- Article: BDR (iPad): Setting up the devices
- JAMF Allocation
- Go to JAMF
- Select Devices > Search Inventory > Search for the iPad's serial number.
- Under the Inventory tab
- User and Location menu > Edit > Change the department to BDR > Save changes.
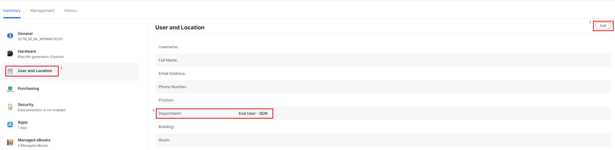
- User and Location menu > Edit > Change the department to BDR > Save changes.
- Then, go to General > Edit > Enter the Account ID and Venue Name
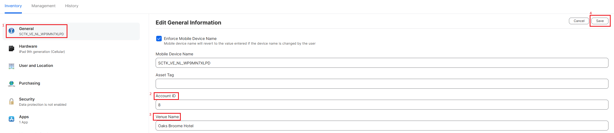
- Wait for the wall paper to change and confirm the BDR App is installed on the iPad.
- HubSpot Allocation
- Under Assets > locate the iPad by the SN.
- Associate it to the Company and Ticket.
- Remove 'Scantek' as the Company.
- Remove the 'Instock Location'.
- Ensure the eSIM and tablet details are correct.
5 - Setup the iPad(s)
- Configure the iPad - especially offline scanning.
- BDR (iPad): Setting up the devices
- Remove the Emoji Keyboard prior to configuring the device in JAMF
- Settings -> keyboards > Edit > Tap on the emoji keyboard and remove it.
- Alternative method: Search in settings for Keyboards to find the setting and remove it.
RELEVANT ARTICLES
- BDR iPads - Reset the 6-digit access code
- BDR (iPad): Setting up the devices
- New login / Requesting Changes
- Arranging Couriers, Connotes Auspost Star Track
- BDR: Setting up the iPad (Offline Scanning)