
PLEASE NOTE: TIMEZONE CONFIG - When you have to set the timezone for the venue please use one of the following:
Australia/Adelaide
Australia/Brisbane
Australia/Broken_Hill
Australia/Darwin
Australia/Eucla
Australia/Hobart
Australia/Lindeman
Australia/Lord_Howe
Australia/Melbourne
Australia/Perth
Australia/Sydney
1. Login the VE portal: https://portal.ve.scantek.cloud
2. Change the Role from "admin" to "Tenancy Admin" then click login. 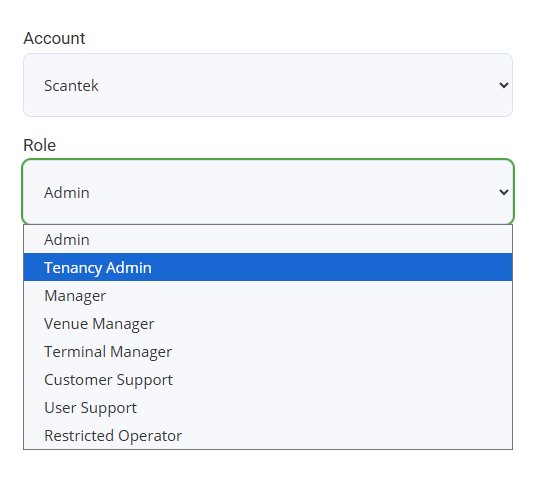
3. Click on " + Add Account" 
4. Type in the name of the venue 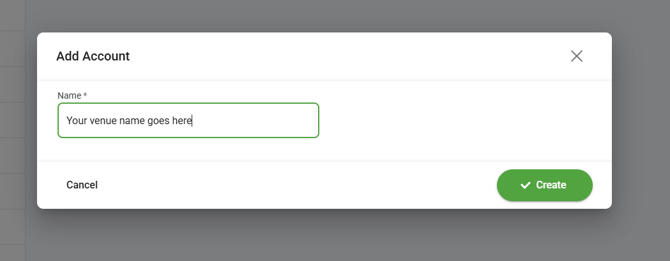
5. Under "Settings" on the left side in the box that says "Select an account", select the account you just created. It will look something like this: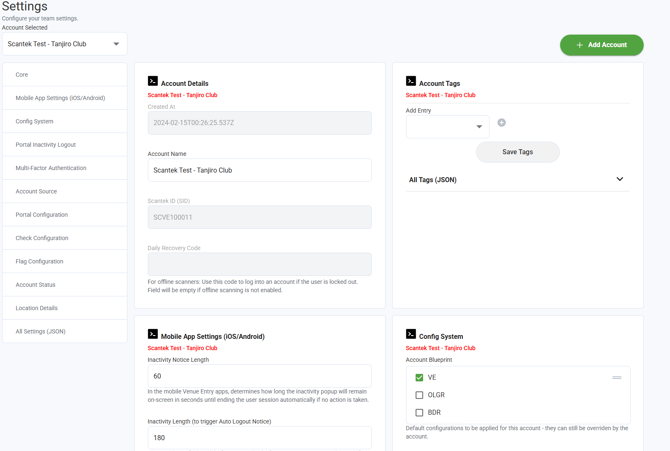
5.5. When you search for your venue name, make note of the portal ID, you will need this to configure the device in JAMF
IMPORTANT: Please copy the "Scantek ID (SID)" ensuring the SID and the portal ID are saved in your notes. You will need both to complete this setup.
6. Jump to "Config system" and tick the box for VE, followed by updating the "Timezone" to the appropriate state, see the top of this article for relevant timezones. Google is also an option. 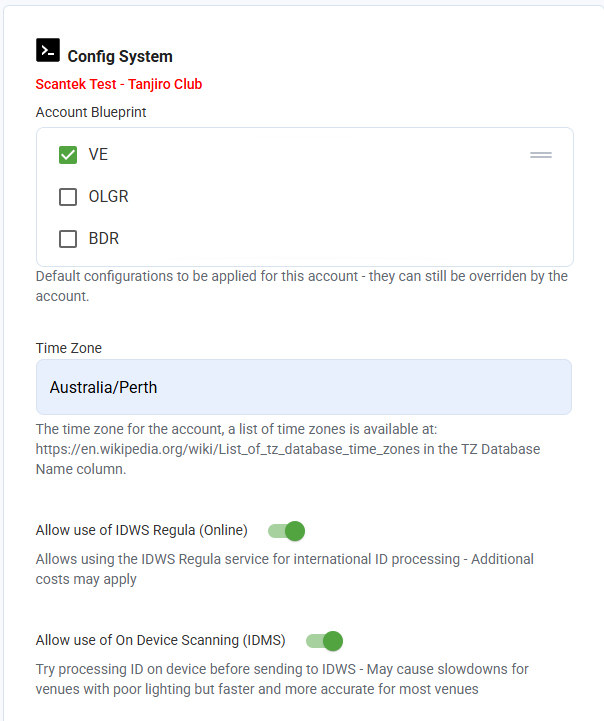
7. Under "Mobile app settings" - the default values are fine, however an alternative suggestion could be used below: 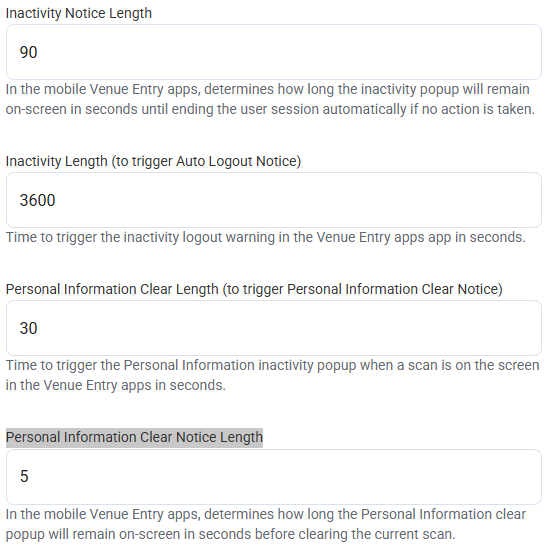
In the same section, jump to "Start of day (hour)" You will need to know the venue's listed operational hours, please do not guess, this impacts the portal.
As stated in this section, its in 24 hour time, please ensure the hours you put here are in 24 hour format only.
Key point: The venue start of day should be accurate, please ensure that the end of day follows the instructions. 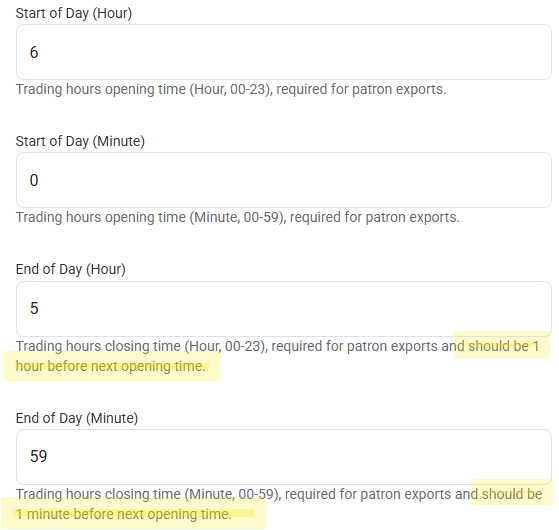
8. Under "Portal inactivity logout"
Leave this as default (28800) , suggested maximum time is 30000, however this isnt necessary unless the venue mentions the inactivity time out being too short. In which case, please consult your team lead or the VE dev team before changing this to a higher value. 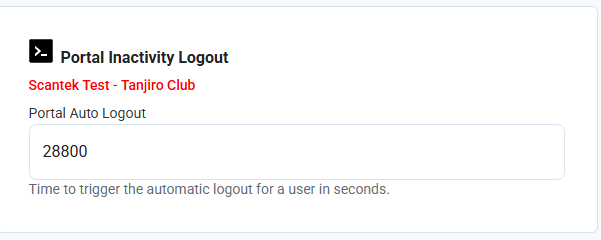
9. Under "Multi-Factor Authentication"
Please leave this as default, if the user account requires manager account they will need OTP regardless.
10. Jump to "Account status" Ensure this is set to "open" then across under location details, add the venues literal address and hit save.
If you dont hit the save settings button, its not going to save ANY changes you've made, you're better off hitting the save button twice for good luck BEFORE you jump to the next steps. (optional)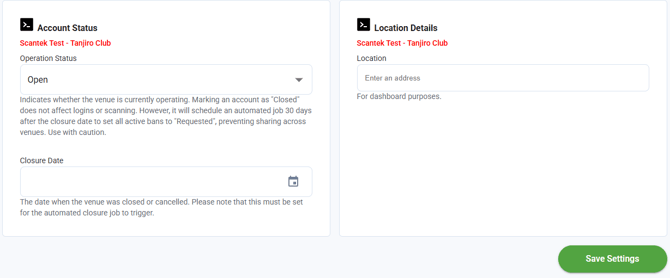
Creating User Accounts:
1. Same portal - Select "User Management" 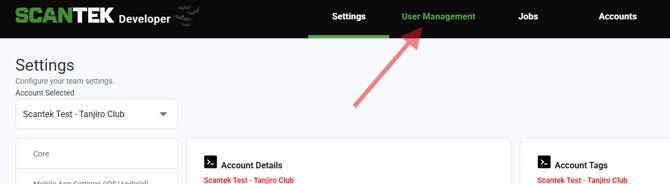
2. Locate the account you'd like to add user accounts to and then click "+ Add User"

3. Add the user information into ALL relevant fields. 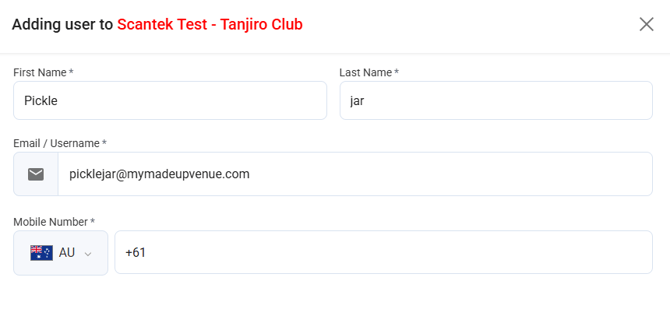
On the exact same pop up, select the role of the person.
If this is the very first account for the primary contact, select the roles: " Venue Manager" & "Restricted Scanner" , once you've done that, click "Create user" 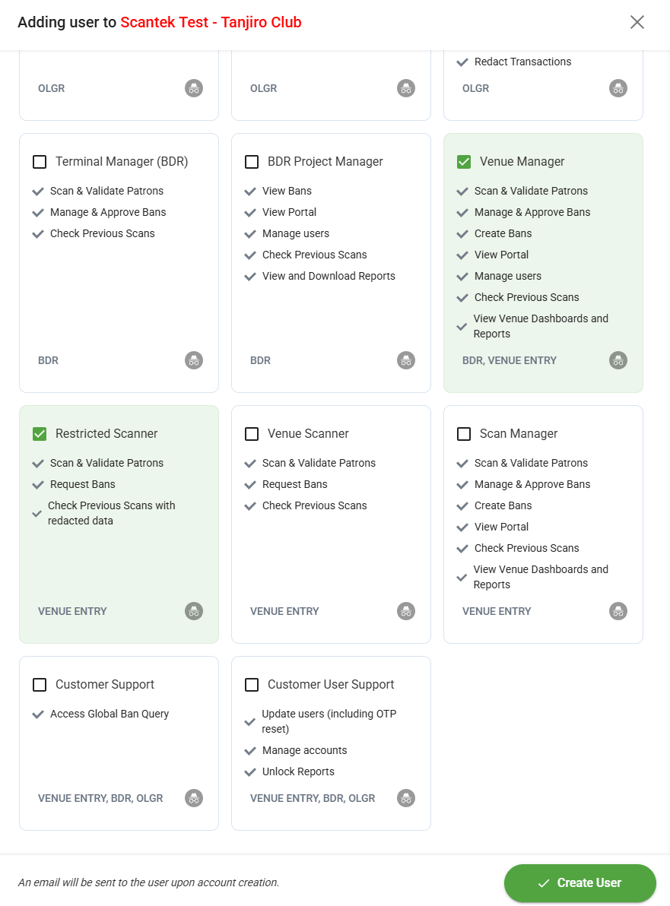
^ as it states in the screen shot, an email will be sent to the user, the moment you click the big green button.
The portal and user accounts have been successfully created, lets configure the device.
Assigning an iPad to the Venue
1. Open a browser tab to: https://scantek.jamfcloud.com/
2. Click on "devices" in the left menu -> "Search Inventory" and paste or type in the serial number of the device you are configuring. and click search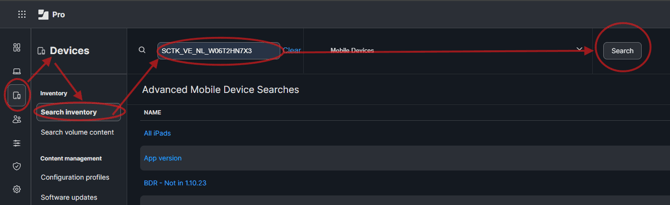
3. Once you find the device in the list, click on it
3.5. On the "General" page of the device, on the right side of the page, click "Edit" it will take you to the "Edit General Information" tab. 
- Ensure that "Enforce Mobile Device Name" is ticked and the name matches whats present in Hubspot.
- In "Venue name" add the venue name (the same thats in the portal)
- In "Account ID" add the portal ID (the one you saved from the portal in your notes)
Click the "Save button" 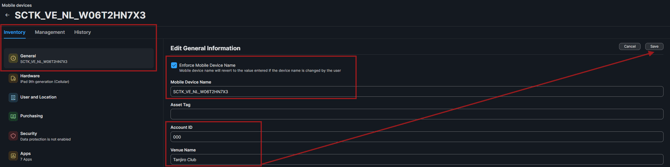
4. Click on " User and location" in the left menu and click "Edit" 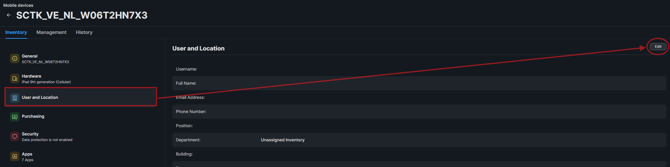
4.5 Set the "Department" to "End User - VE" and click "Save" In the top left corner. 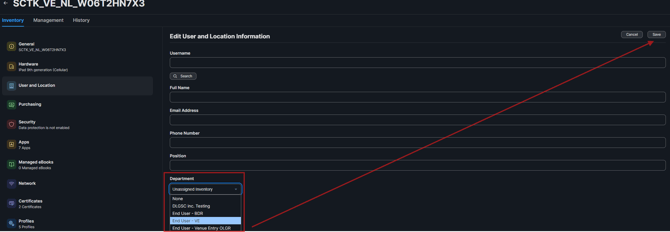
5. Click on the "Management" Tab - Ensure there are no failed commands, youshould see a whole list of times under "Pending commands" Allow this to complete.
NB: You will see the ipad update in real time,if it isnt, ensure its connected to WIFI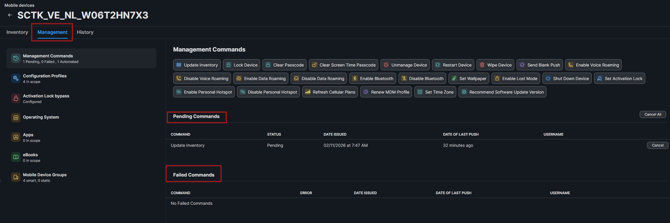
Once all the commands clear, check the device to ensure the VE app is ready to go.
6. QA
items you will need to ensure are done and is expected this is noted in your ticket notes.
- Confirm the IOS of the device is not below 18.5
(26.4 is the current approved IOS version, this is subject to change)
- If its below 18.5 -> update the IOS on the device. If you are unsure on how to do this >click here<
- Open the VE app on the device, you will see an initialising window, DO NOT INTERRUPT THIS.
its downloading config, allow it to complete, do not lock the device, or turn it off, or disconnect/connect to a network while this is happening, itll just restart the process.
Once you see the log in screen on the VE app, the device is good to go.